
Best cheap eSIM for your Thailand trip
Real world review and setup guide

I used an eSIM in Thailand for 3 weeks to see if it can replace a local SIM for remote work and heavy data usage.
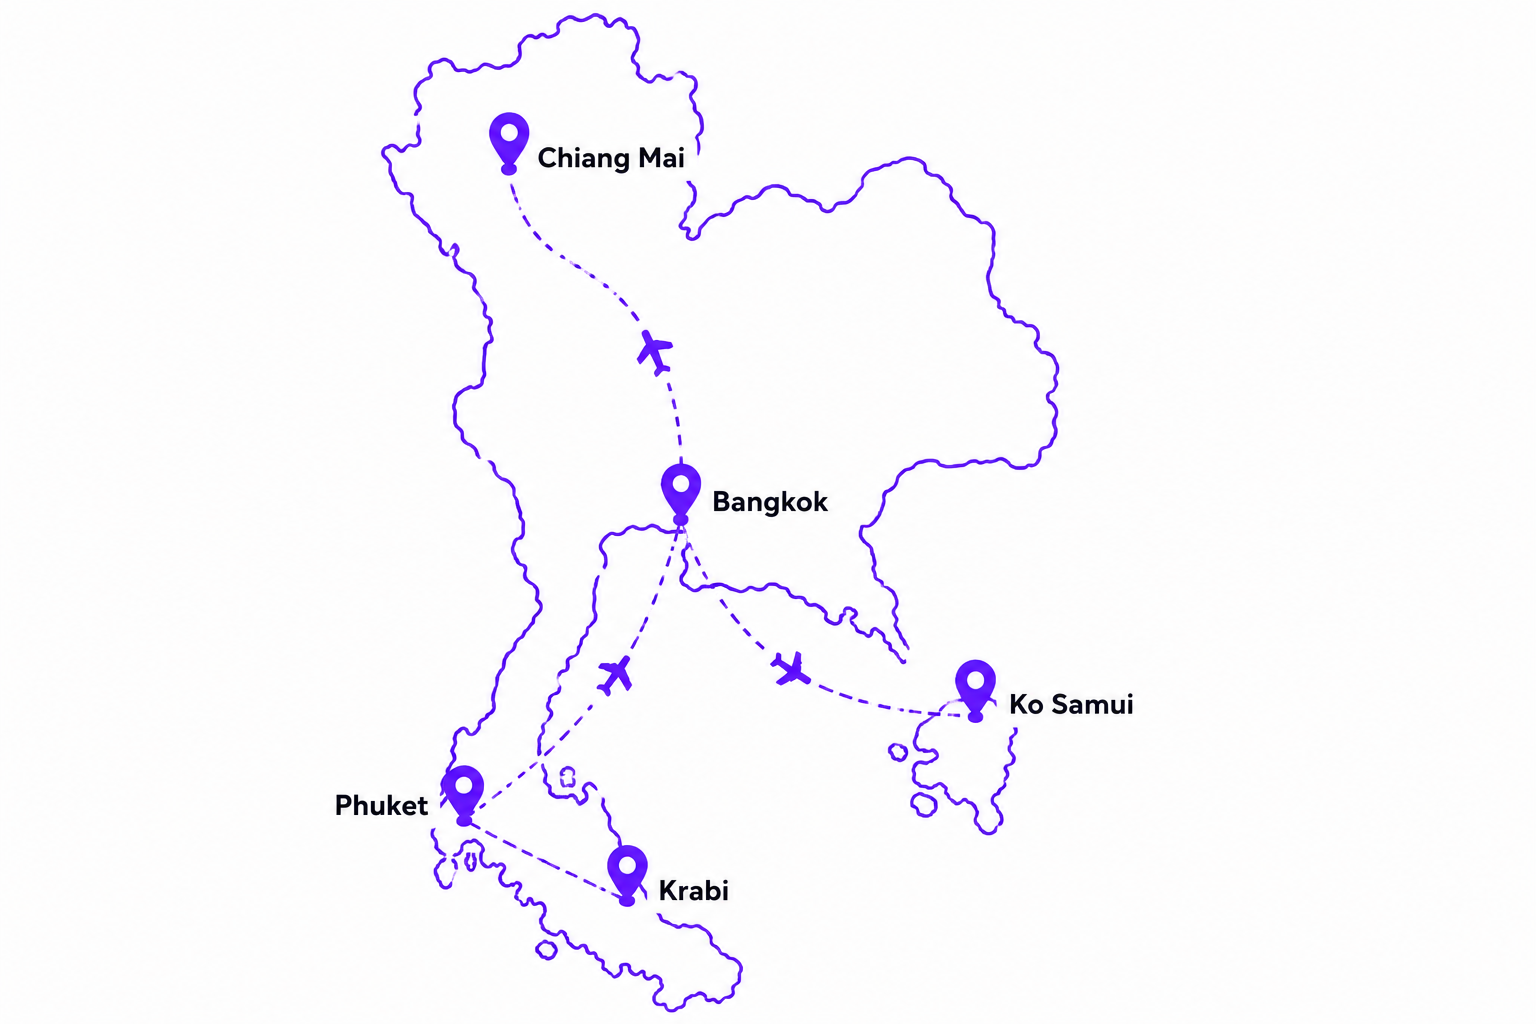
The route covered Bangkok, Chiang Mai, Phuket, and several days on the islands of Ko Samui and Krabi.
What I used data for every day
- Laptop hotspot for Zoom and Google Meet calls
- Google Maps, Grab, DeepL, and Google Translate
- Uploading and sharing trip photos and videos via Telegram, WhatsApp, and Slack
- Streaming on Netflix and YouTube
How much data I actually used
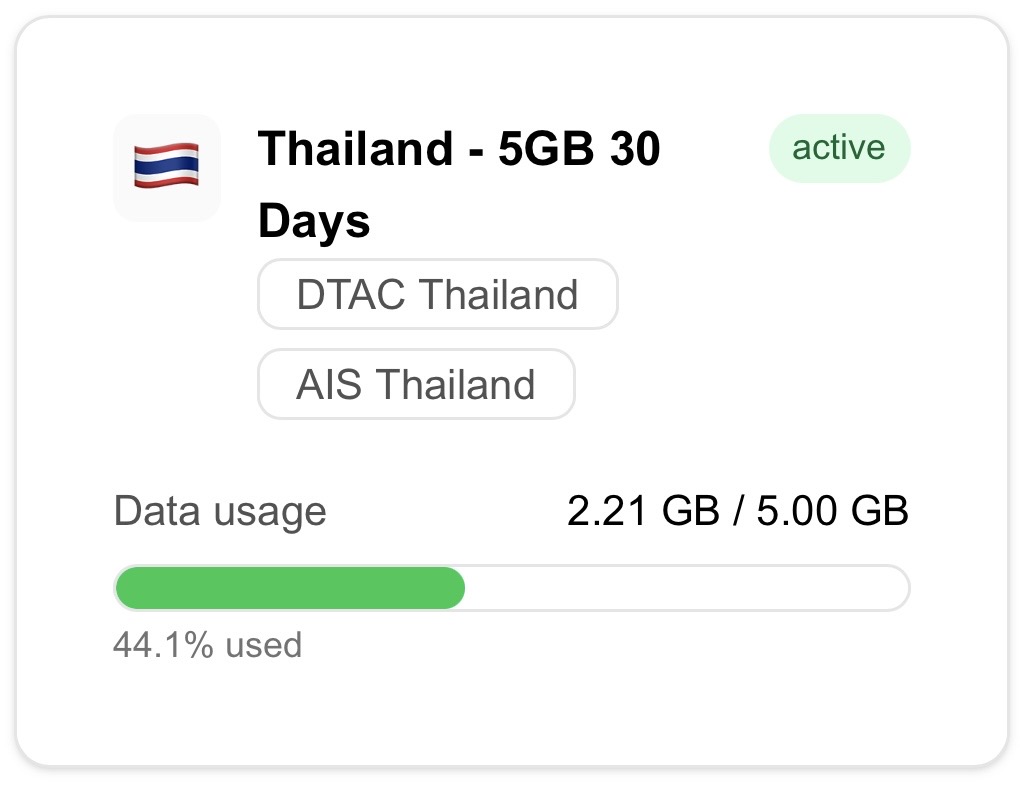
I started with a single 10 GB plan, nothing used yet. The app shows every plan with its own usage bar, so you always see how much data is left and when it is worth topping up.
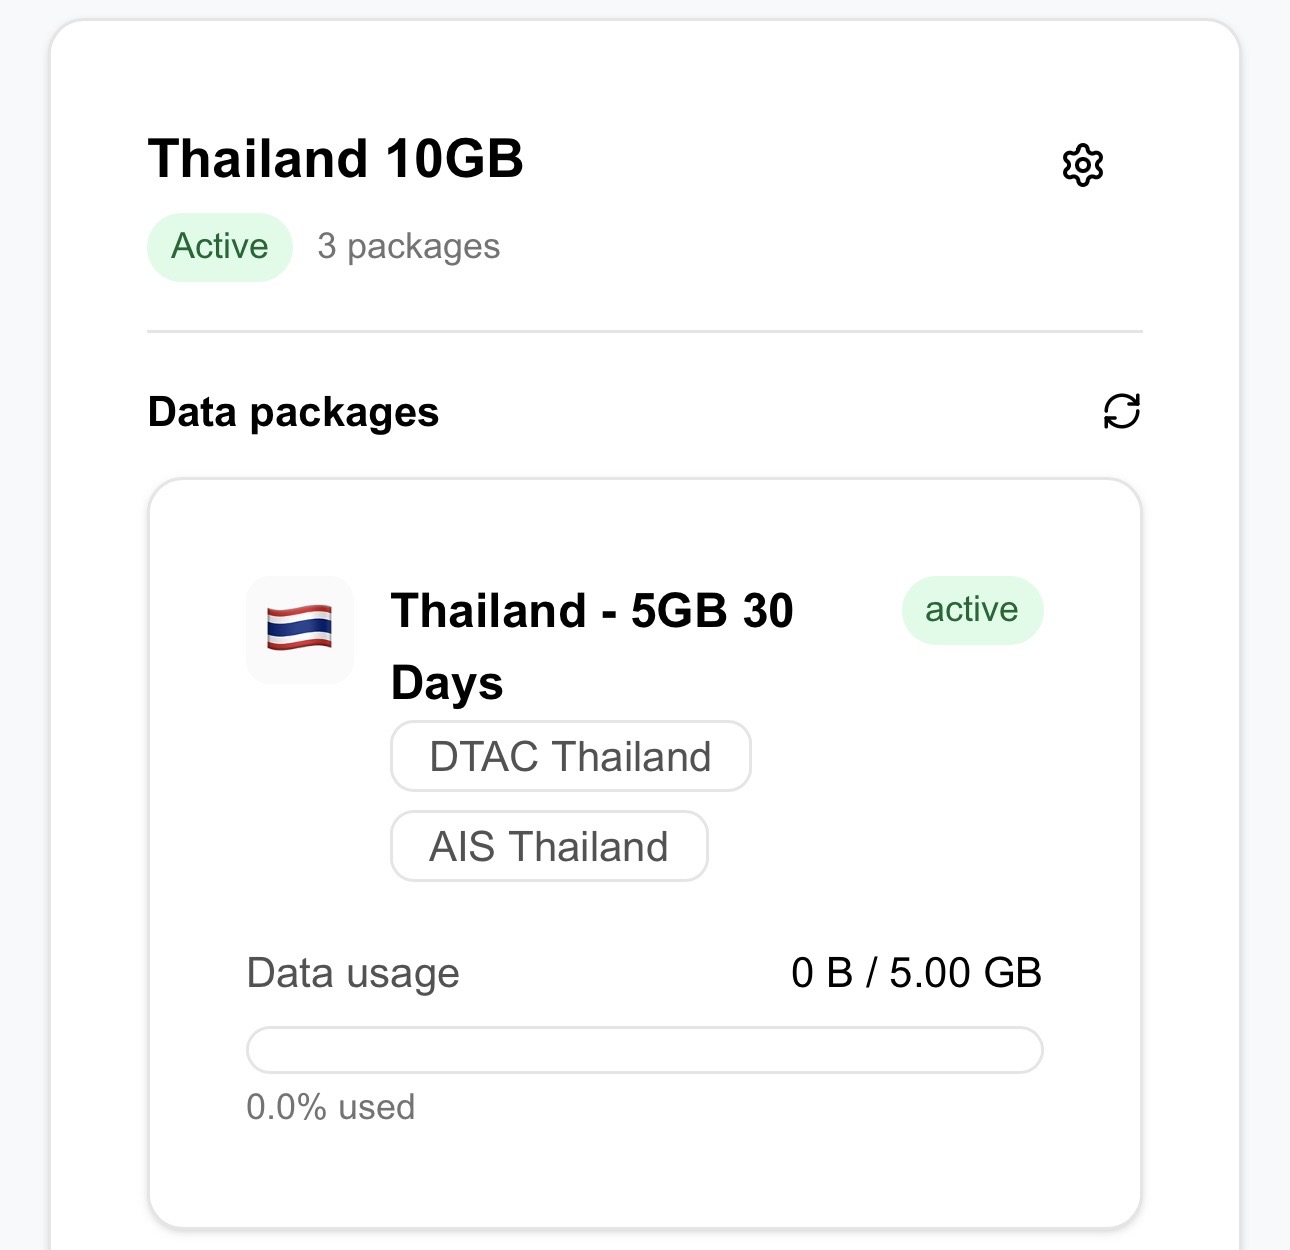
When it ran low I added 10 GB, then 5 GB more, right in the app. Same eSIM, no new QR code, no reinstall. The phone just moved to the next package automatically when one ran out.
How it held up across regions
- Bangkok: 5G reached me inside the BTS metro and major shopping centers
- Phuket: usable from the beaches and during motorbike rides between coves
- Krabi and Ko Samui: speed sometimes dropped to LTE but the connection never cut out
- Laptop hotspot: stable enough for video calls without dropouts
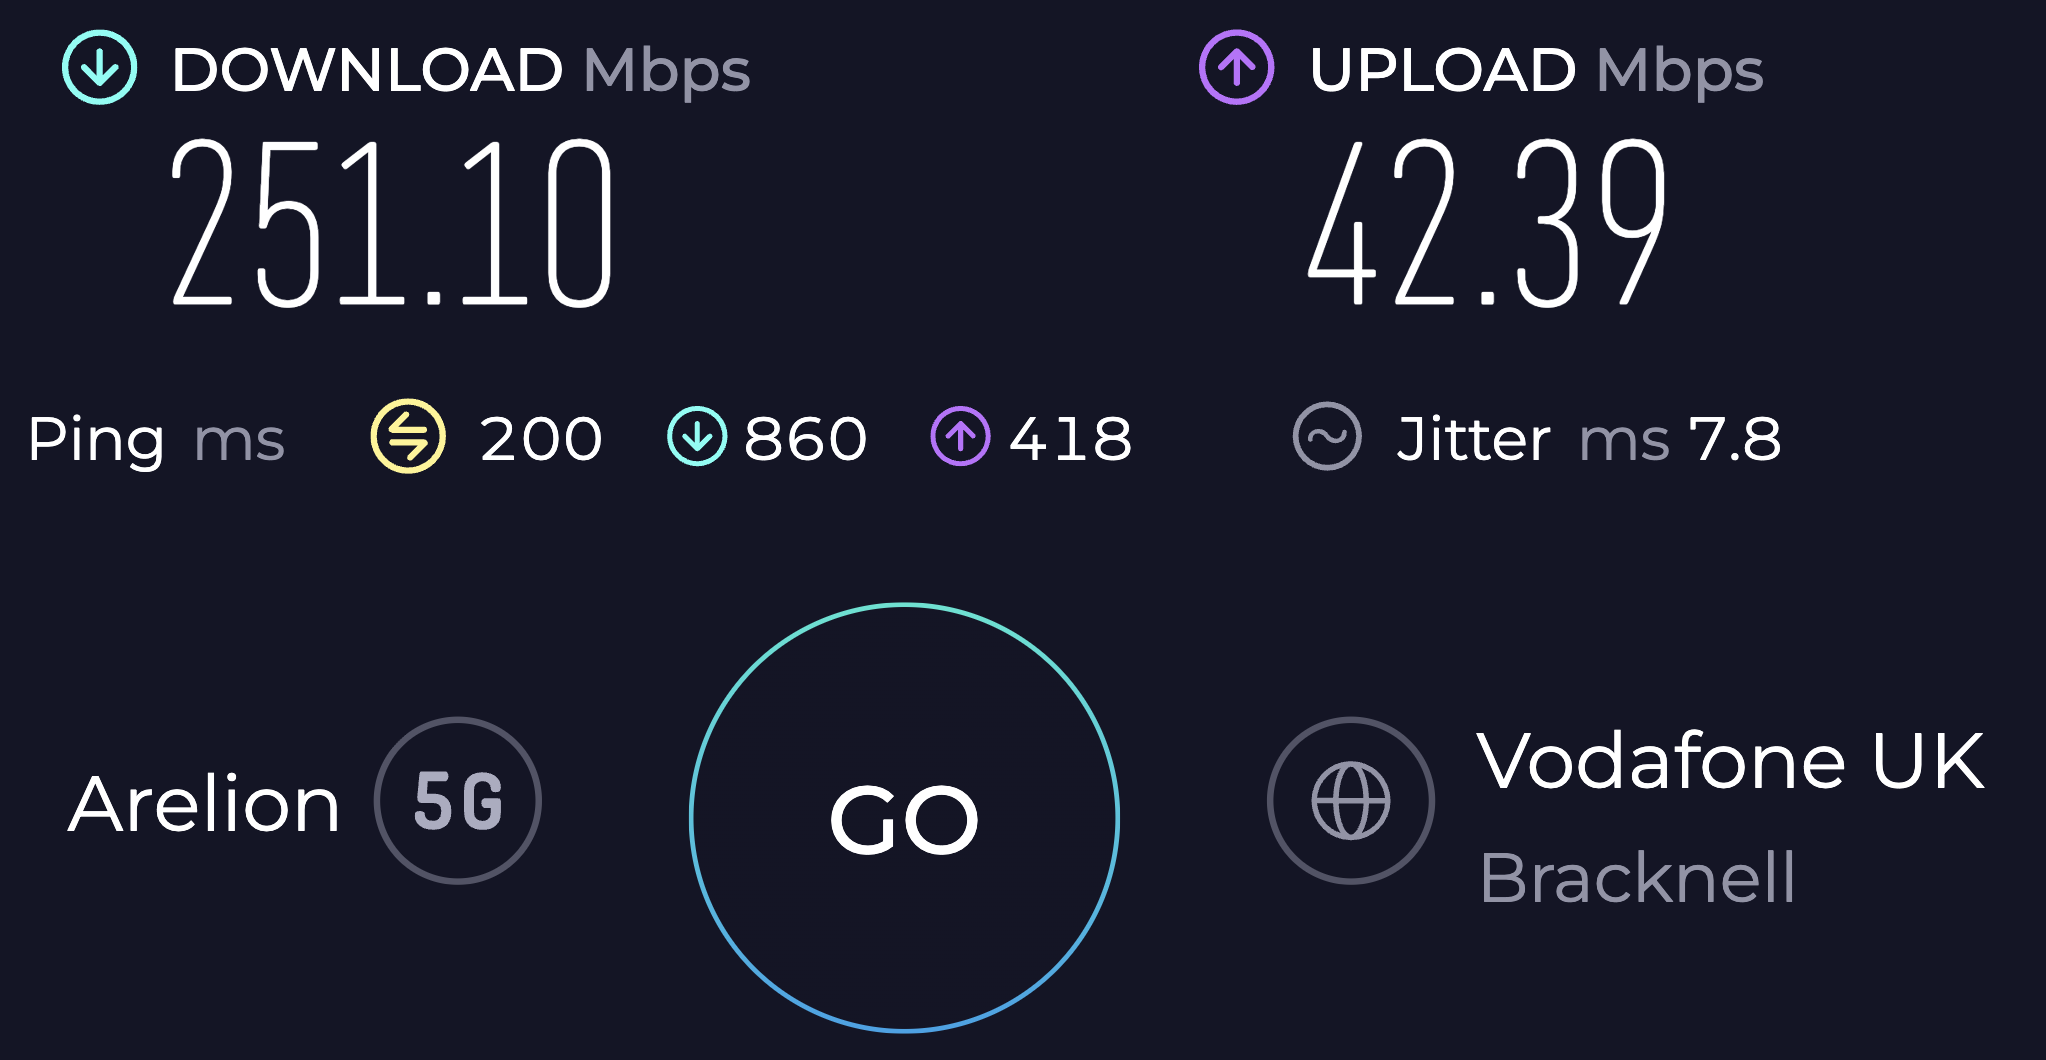
Confirmed 5G speed in Thailand
Measured on the eSIMPal eSIM in Bangkok. Tap verify to open the original Ookla result.
 Verify on Speedtest
Which Thailand plan fits your trip?
Pick the closest match. You can always top up later if you run out.
Layover or weekend
Bangkok stopover or a weekend in Phuket. Enough for maps, messaging, and quick check-ins.
City break (3 to 5 days)
Maps, Grab, food delivery, social posts, and the occasional video. Most popular for short trips.
Full trip (1 to 2 weeks)
Bangkok plus islands plus Chiang Mai. Comfortable margin for hotspot use and video calls home.
Remote work or month-long
Daily Zoom calls, laptop hotspot, cloud uploads. Built for digital nomads and long stays.
How much data do I need?
Set your trip length, tick what you'll do, get a plan size.
You'll be comfortable with 3 GB
Pick your Thailand eSIM plan
Choose a data size, install before you fly, and activate when you land. Every plan is pay-as-you-go with in-app top-ups.
🇹🇭Thailand
🇹🇭Thailand
🇹🇭Thailand
🇹🇭Thailand
🇹🇭Thailand
🇹🇭Thailand
🇹🇭Thailand
🇹🇭Thailand
Connected with major mobile operators in Thailand
Two of Thailand's largest mobile networks. Your device switches between them automatically based on coverage strength.

AIS Thailand
Network code: 520-03

DTAC Thailand
Network code: 520-05
Your device auto-selects whichever network has the strongest signal in your location. Network codes are public identifiers from the GSMA registry, verifiable from any IMSI lookup tool.
Buy with confidence
Refund if it does not work, real support around the clock, and your eSIM delivered instantly.
30-day money-back guarantee
If your eSIM does not work as expected, you get a full refund within 30 days. No questions asked.
24/7 support
Reach the team via the website or email any time, including weekends and overnight in your destination's timezone.
Instant delivery
Your eSIM is available instantly in your dashboard. Activate any time.
How to activate your Thailand eSIM
Here is the exact activation flow, captured step by step on a real iPhone. The whole thing takes about two minutes. Install before you fly, then switch it on when you land in Bangkok.
- 1
Get your eSIM email
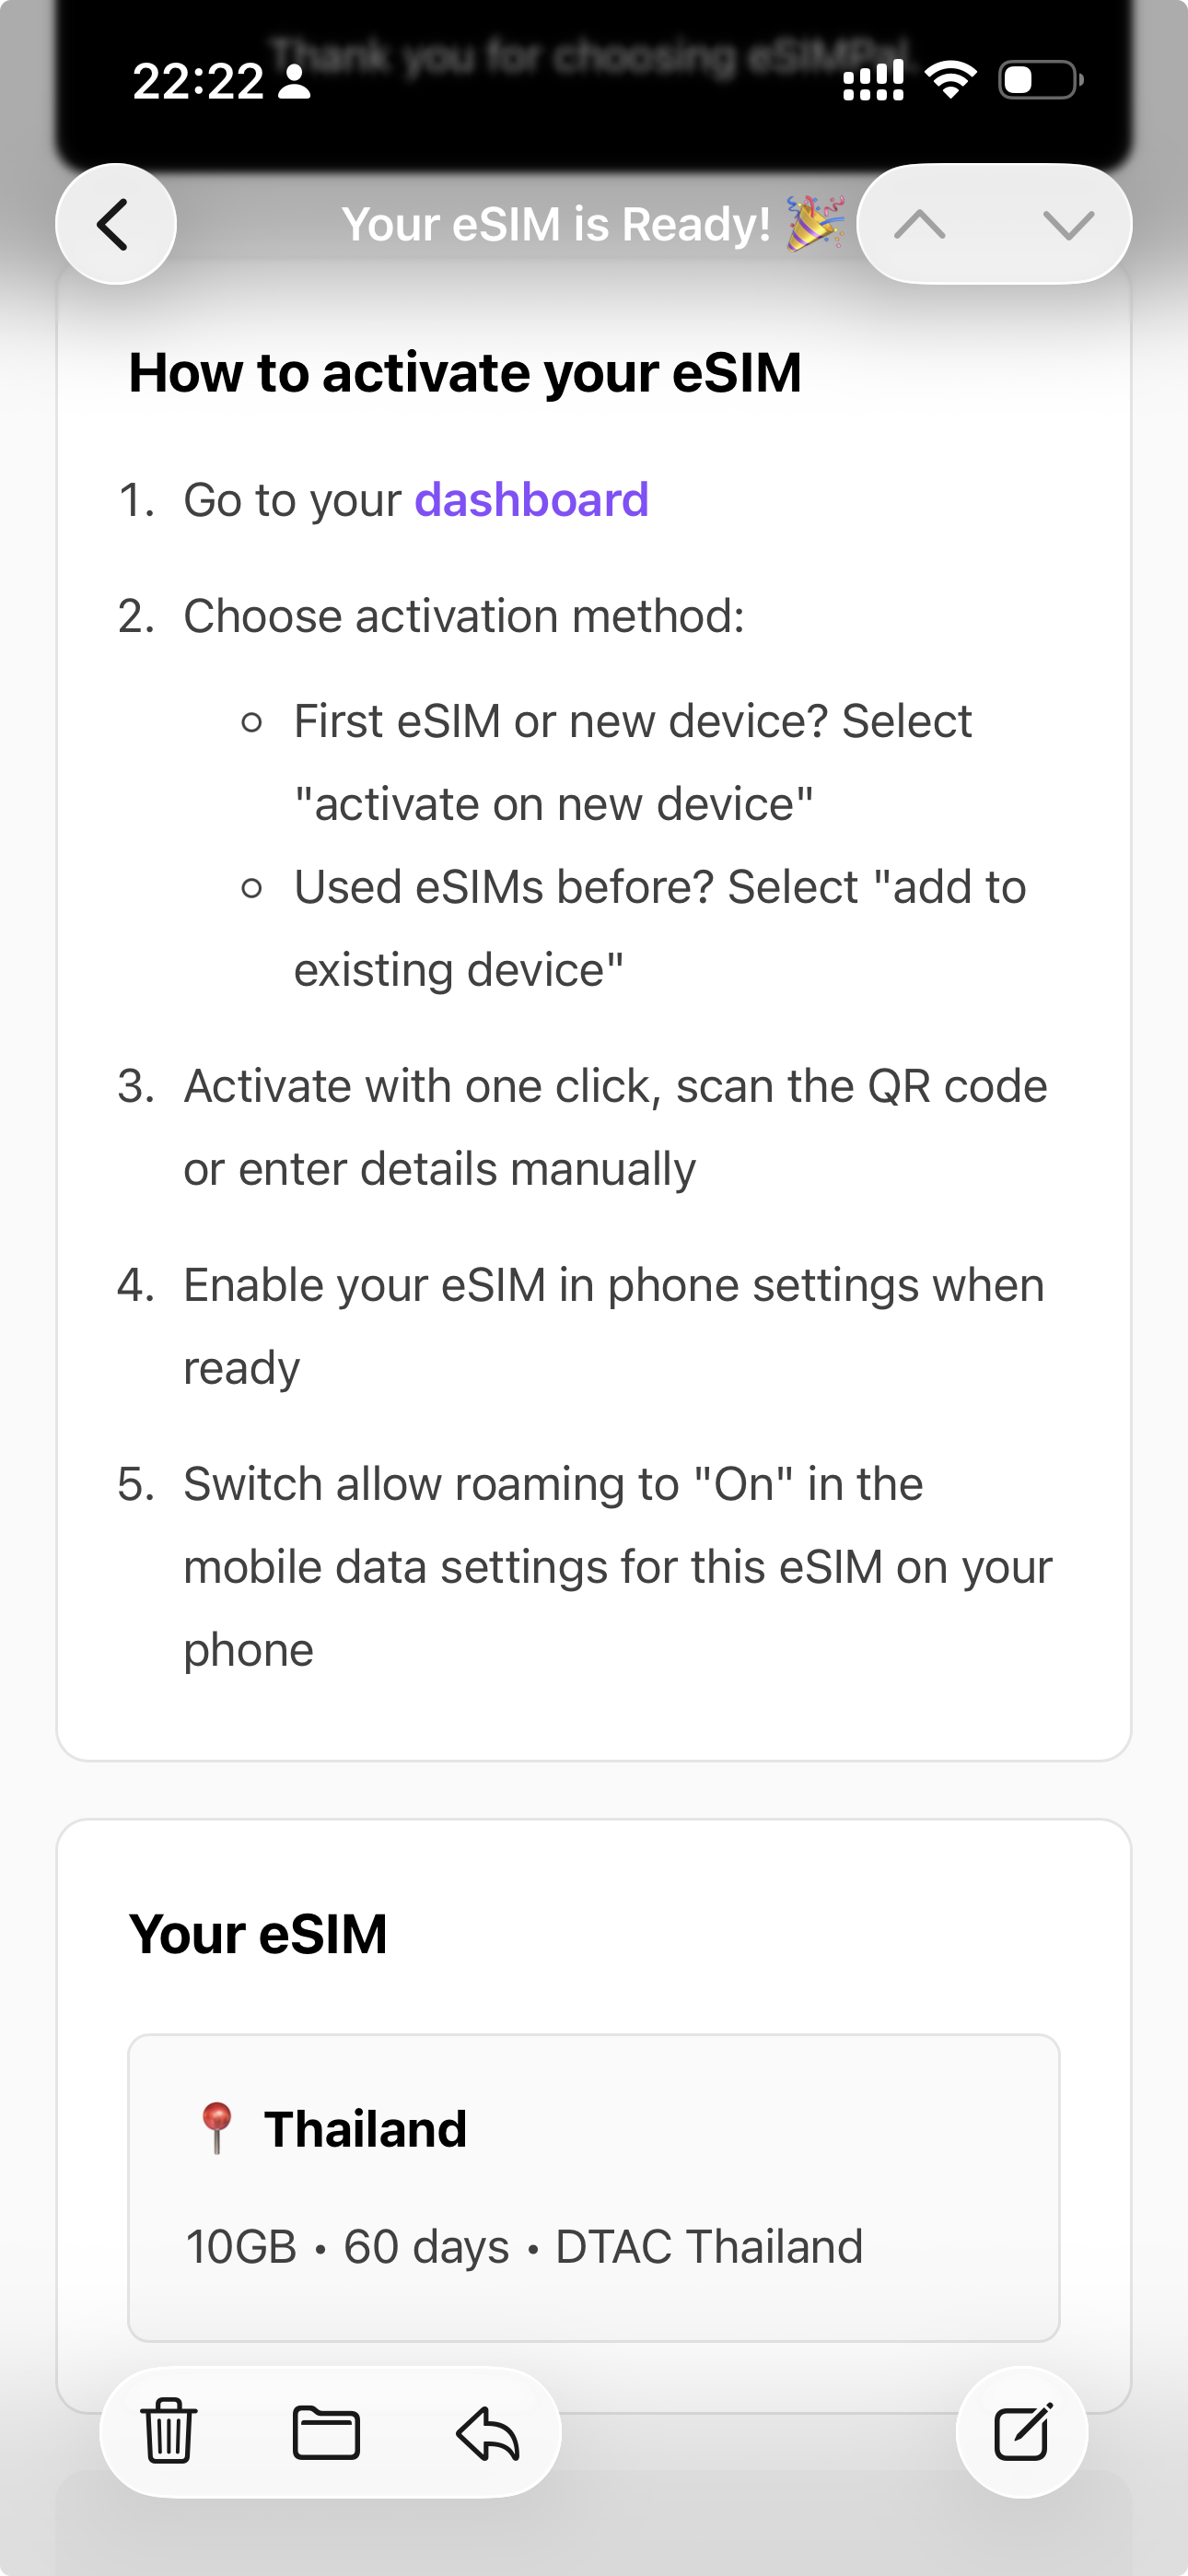
Right after checkout you receive a “Your eSIM is Ready” email with your Thailand plan (here: 10GB for 60 days on DTAC) and a link to your dashboard.
- 2
Open your dashboard
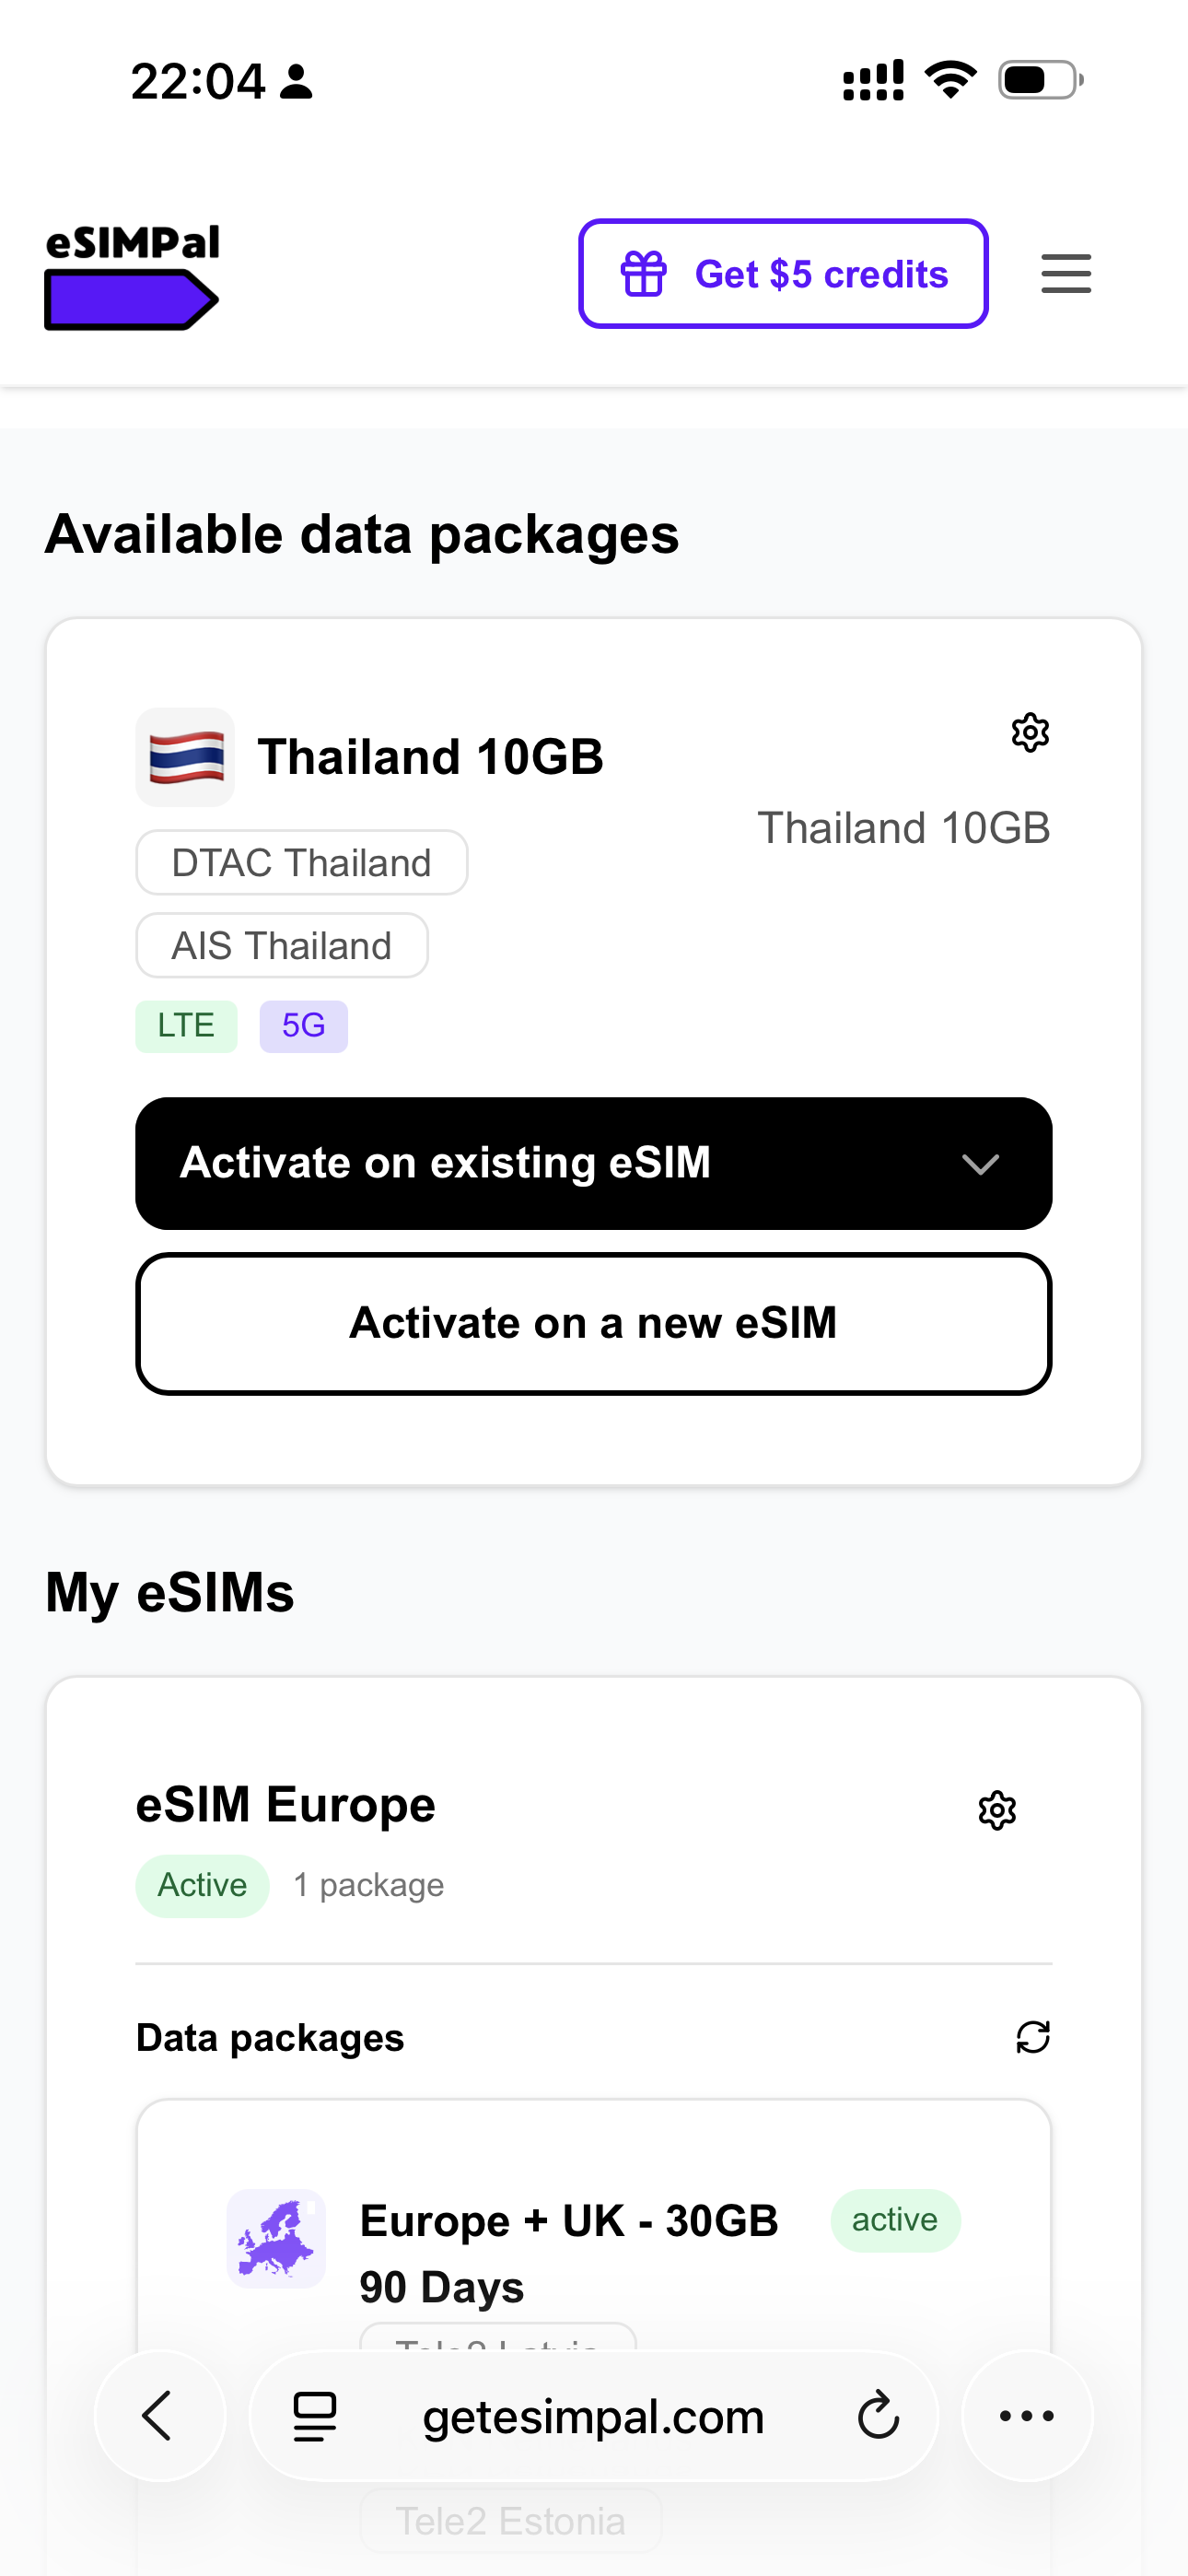
Go to your dashboard and find your Thailand package. Choose “Activate on a new eSIM” for a fresh install, or “Activate on existing eSIM” if you have used eSIMs before.
- 3
Scan the QR code
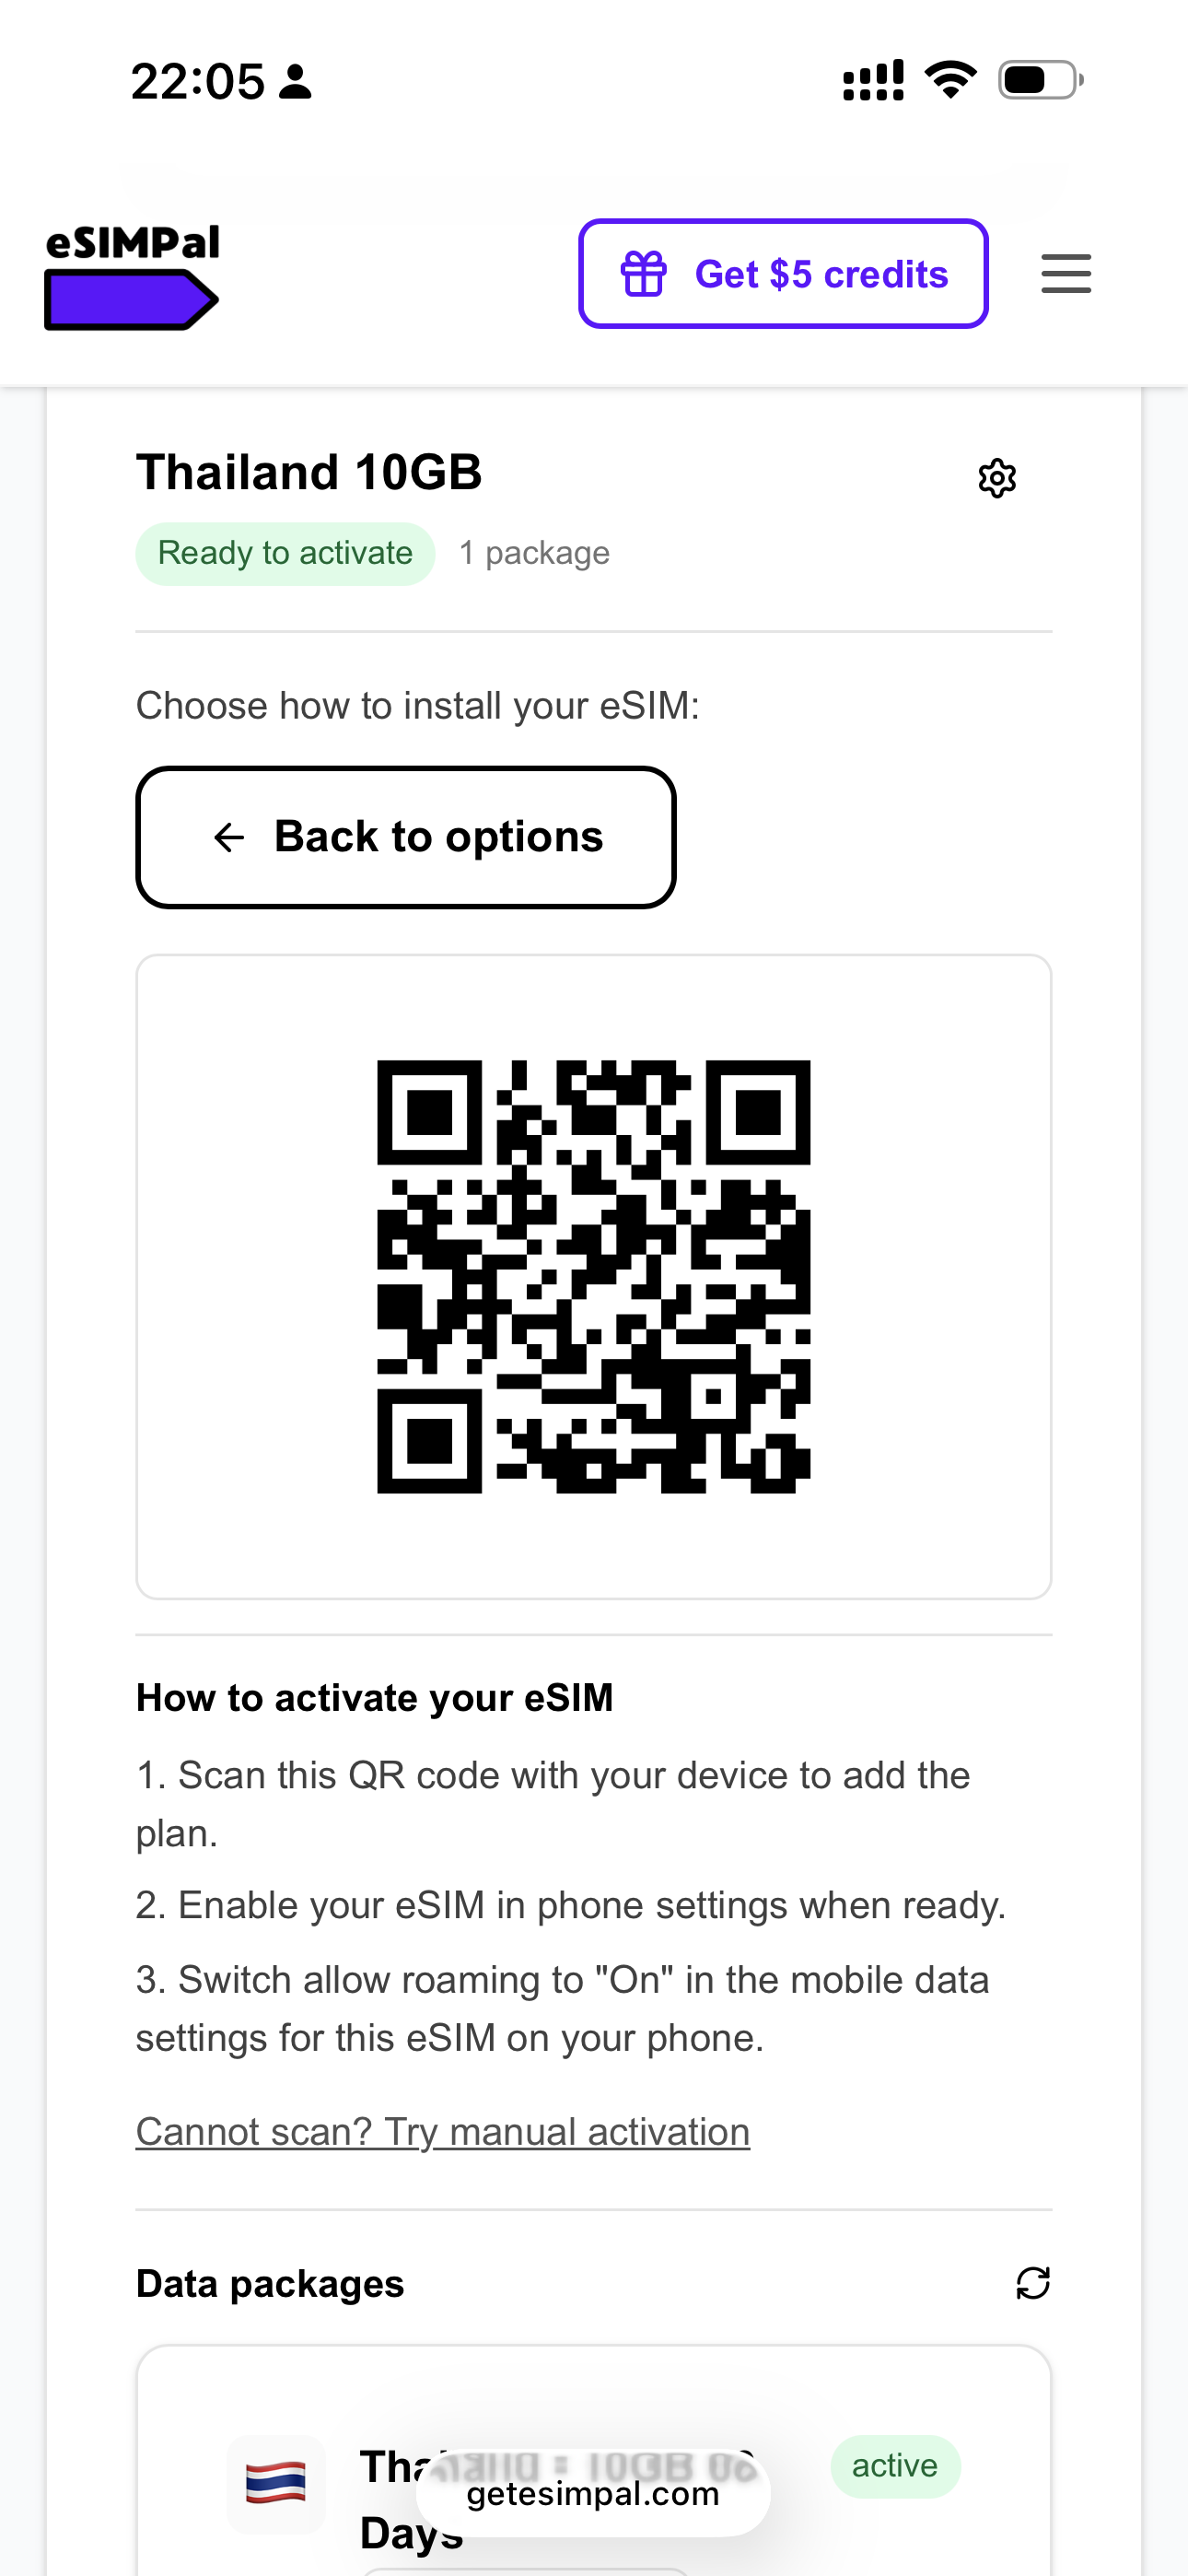
Scan the QR code with the phone you will use in Thailand (installing from a second device is easiest). No second device? Tap “Cannot scan? Try manual activation”.
- 4
Let your iPhone set it up
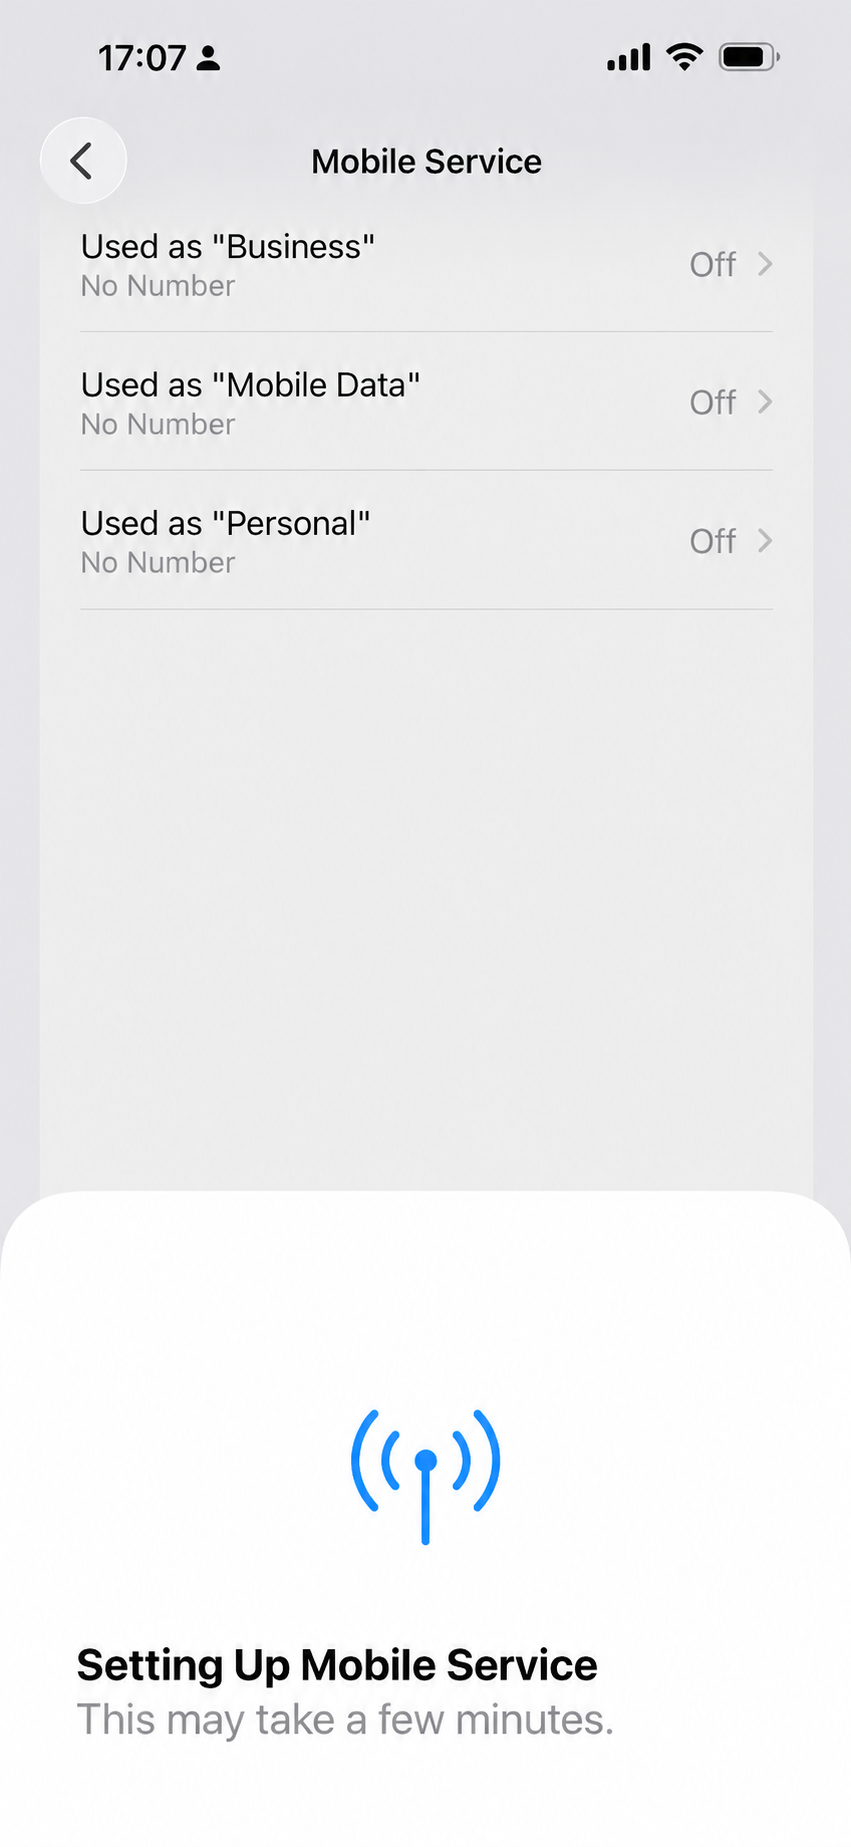
Your iPhone adds the eSIM and starts “Setting Up Mobile Service”. Give the line a label (for example eSIMPal) so it is easy to recognise next to your home SIM.
- 5
Wait for it to connect
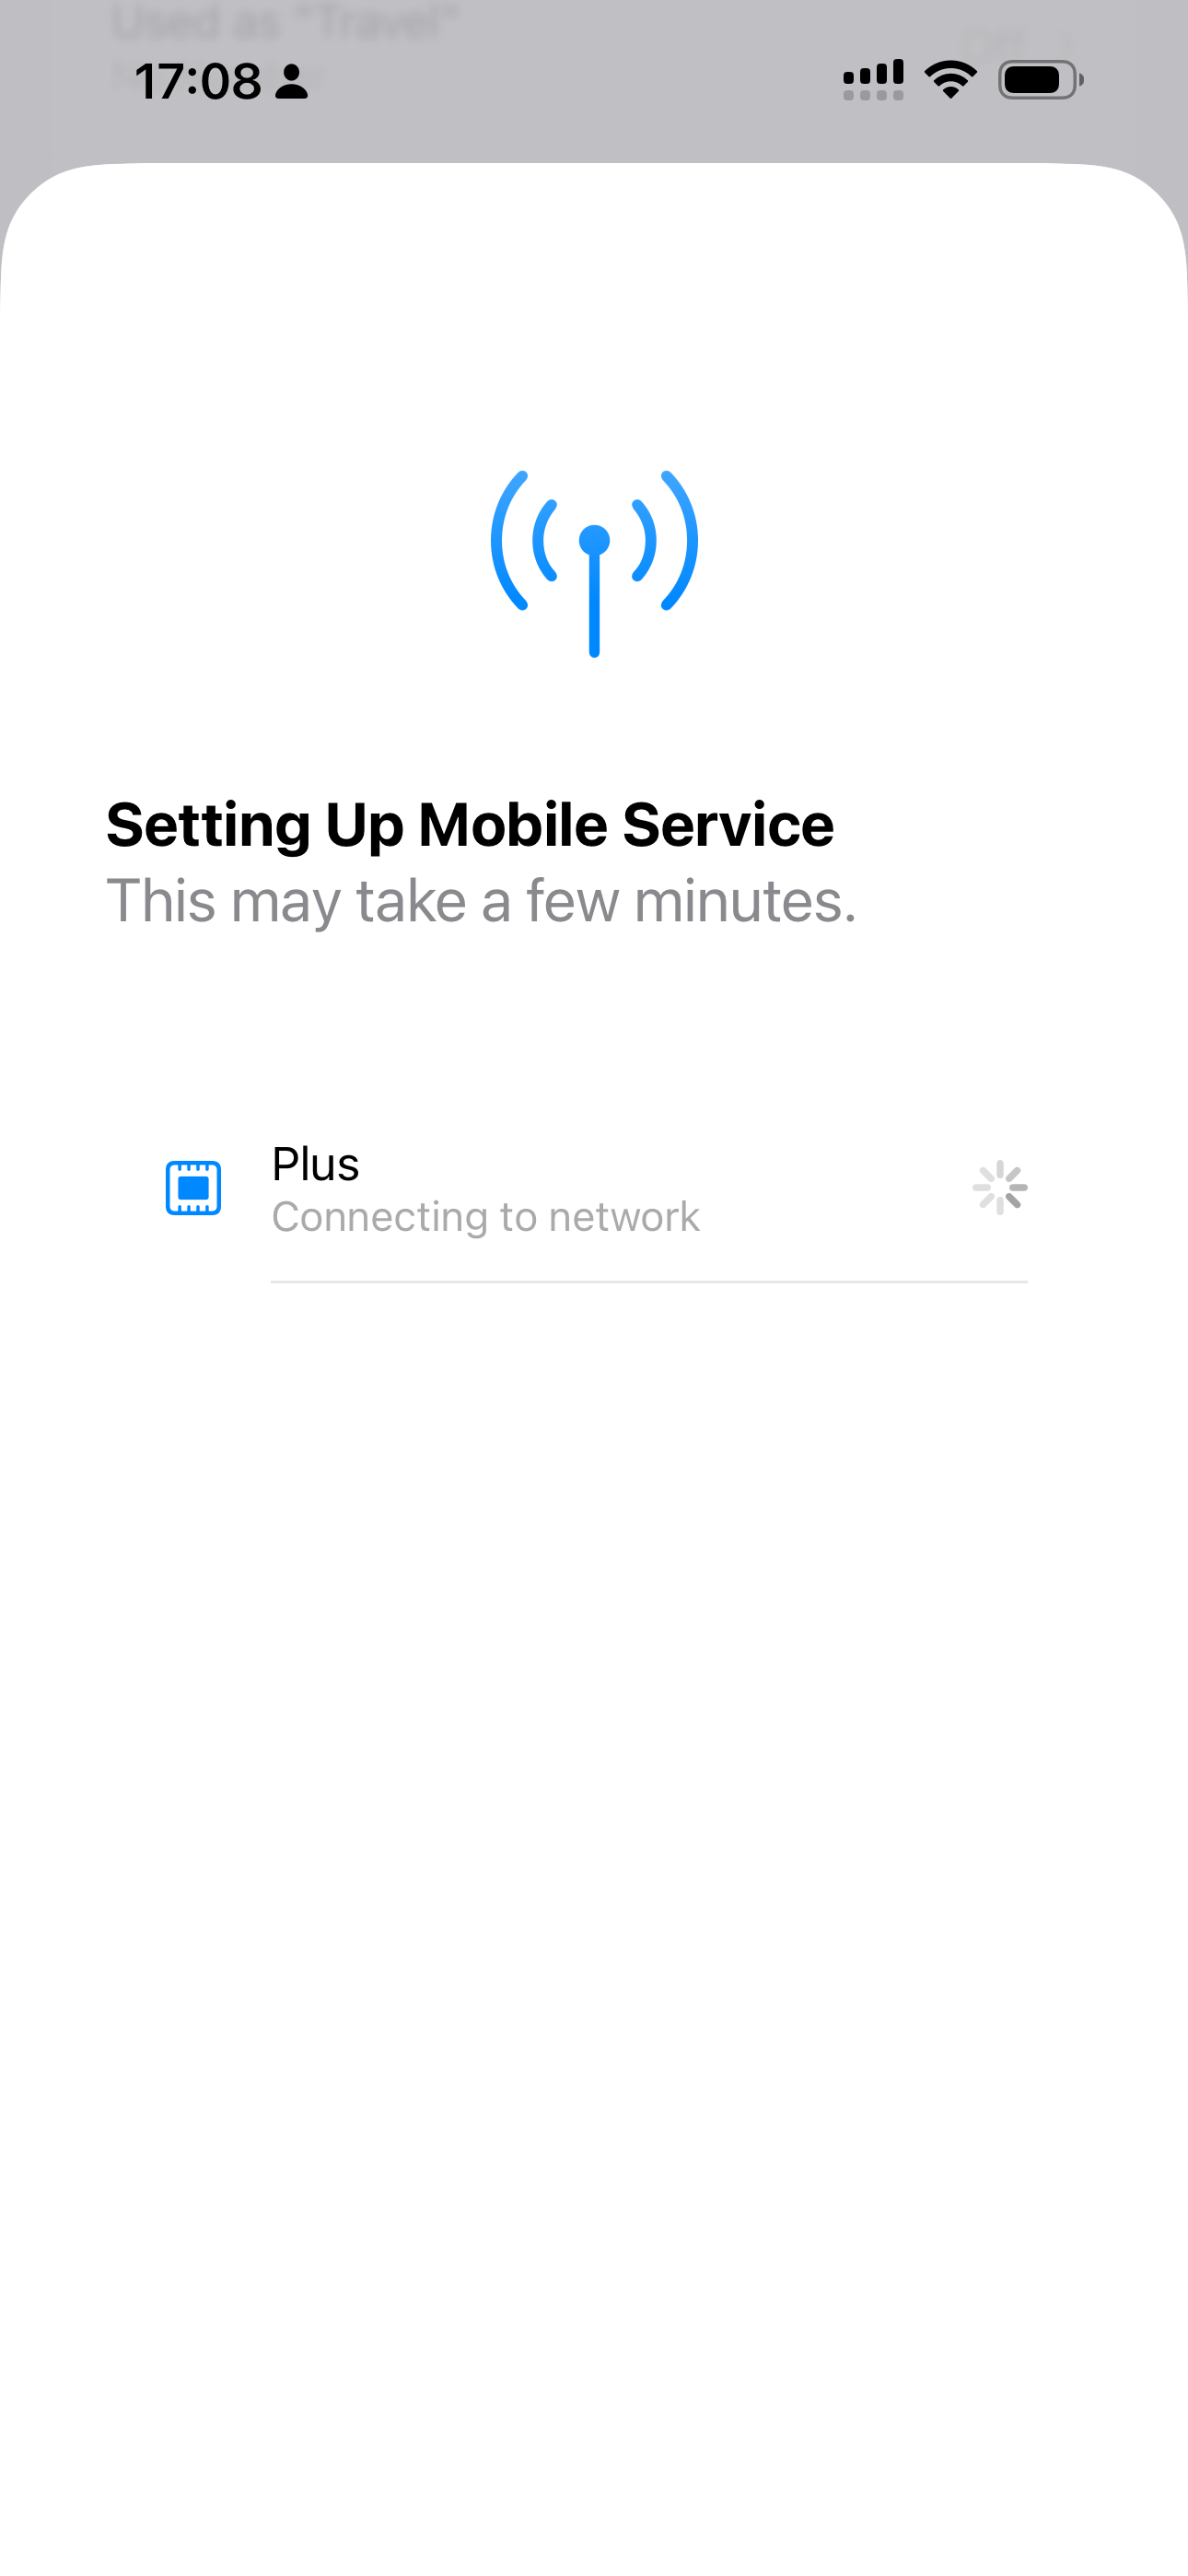
The new line shows “Connecting to network” and then “Ready”. Within about a minute your iPhone registers on a Thai network (DTAC or AIS).
- 6
Turn on Data Roaming
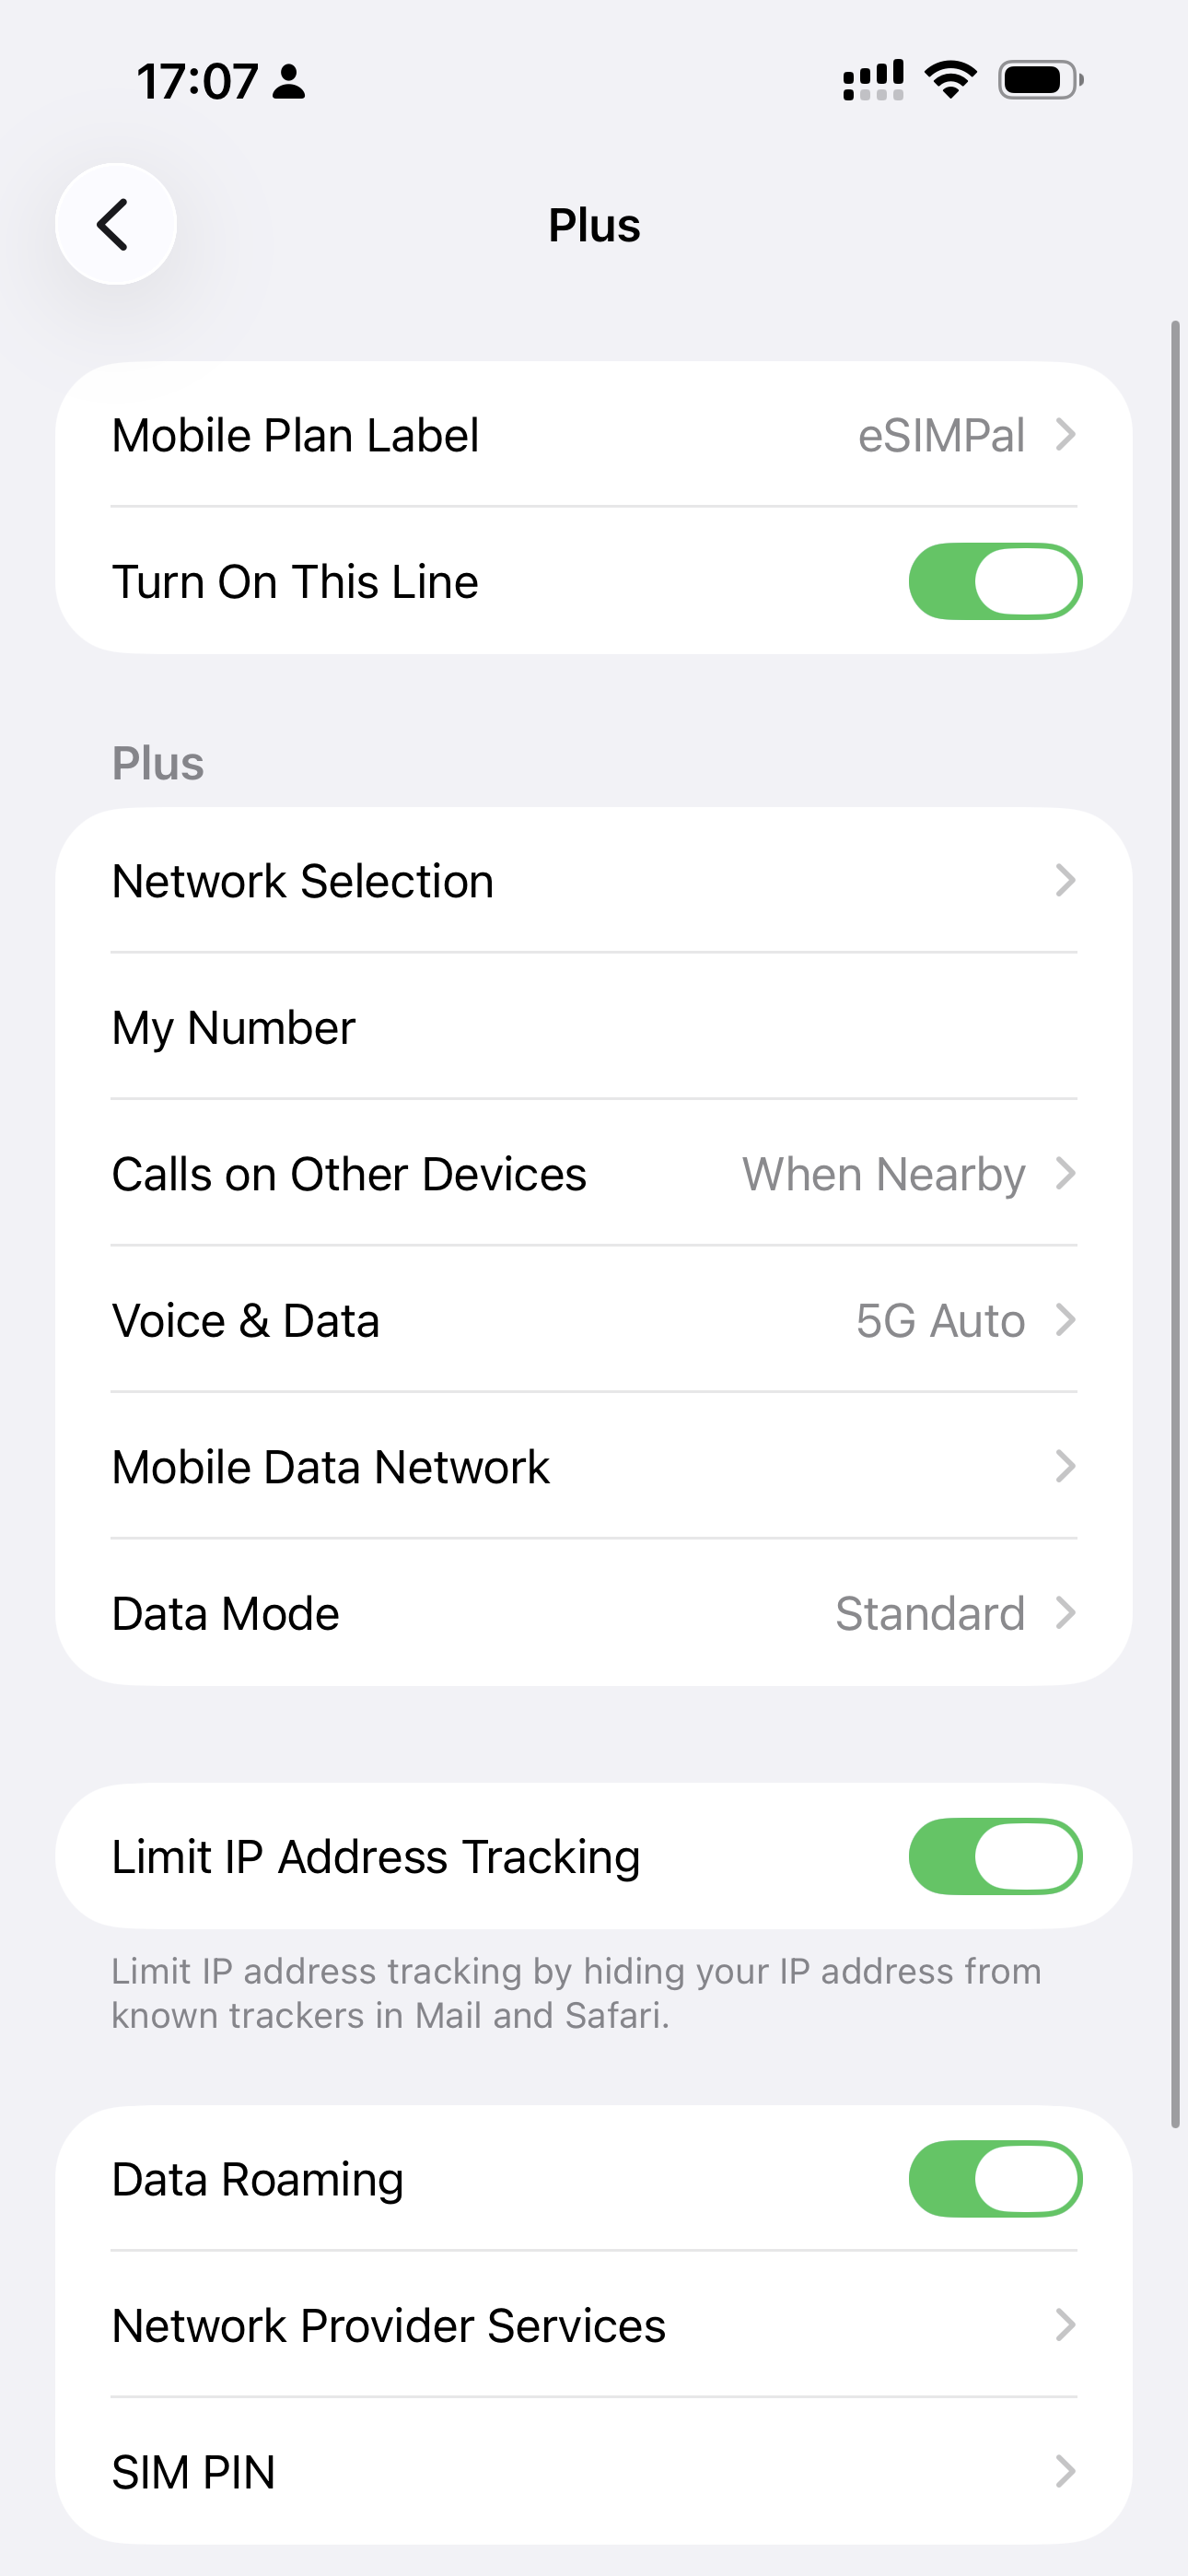
Open the eSIMPal line in Settings and switch Data Roaming on. This is required for travel eSIMs and is the step most people miss. That is it, you are online.
Tip: install on home WiFi before you fly. On landing, switch on Data Roaming. It's required for travel eSIMs and doesn't cost you anything extra.
Does my phone support eSIM?
Type your phone model and get the answer in two seconds.
How eSIMPal compares to other Thailand eSIM providers
See how we stack up against the competition. We're the only provider offering no-questions-asked refunds.
| Feature | Best valueeSIMPal | Airalo | Saily | Holafly |
|---|---|---|---|---|
| Price (1GB) | $2.90 | $4.90 | $4.90 | $3.90 |
Easy to use | ||||
24/7 Support | ||||
One eSIM for all destinations | ||||
Reusable eSIM | ||||
No questions asked refund | ||||
Suitable for families |
*Prices shown are for 1GB plans. Features and pricing may vary. Last updated based on public information.
Frequently asked questions
Everything you need to know before your trip.
What travelers say about using eSIM in Thailand
I installed it before flying and had data as soon as I landed in Bangkok. I booked a Grab, messaged my hotel, and avoided airport WiFi completely.
Laura P.
Spain
Used it across Bangkok, Chiang Mai, and Phuket. Maps, food delivery apps, and online check-ins all worked smoothly throughout the trip.
Nathan C.
United Kingdom
I needed hotspot for remote work on Koh Samui and it was reliable enough for Slack, email, and a few video meetings each day.
Fernanda M.
Brazil
Much easier than buying a SIM at the airport. Setup took minutes and I stayed connected for ferries, hotel check-ins, and translation apps the whole time.
Jonas R.
Germany
Ready to use your Thailand eSIM?
Choose a plan, install your eSIM in minutes, and arrive in Thailand already connected.